

The Plugins Menu is mainly used to create Indigo objects, convert materials and start rendering.
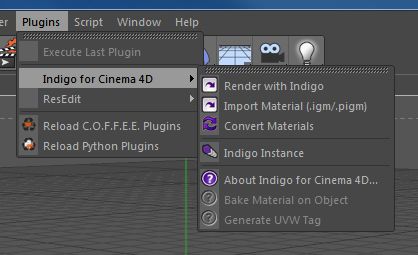
Indigo for Cinema 4D Plugins Menu
Render with Indigo
This exports the current scene to be rendered with Indigo. This works identically to the Cinema 4D command, except it exports using Indigo materials and launches Indigo to render the scene.
Import Material .igm/.pigm
This loads an .igm (Indigo Material) or .pigm (Packed Indigo Material) file from your computer and adds it to your scene so it can be applied to an object.
Convert Materials
This will load all of the Cinema 4D materials and convert them automatically to Indigo materials. Indigo for Cinema 4D will convert all C4D materials automatically on export to Indigo, however using this function will give you more control over the material settings.
Indigo Instance
Creates an instance that can be used to make multiple copies of an object in a memory-efficient and CPU-efficient way. Indigo instances are faster to render than Cinema 4D instances (which aren't real instances but are copies).
Bake Material on Object
Indigo for Cinema 4D bakes all C4D shaders to textures on export, but this feature allows you to bake unique 3D shaders to an objects UV map. It works similar to C4Ds "bake on object" command. A decent UV map is required. To use this function follow these steps:
Select the texture tag of a polygon object that has an Indigo material applied. Click Plugins > Indigo for Cinema 4D > Bake Material on Object.
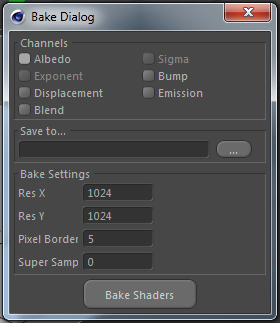
Bake Material on Object dialog box
Select the channels you want to bake and specify an output path. Pixel Border adds a blank border to the output texture file. Super Sample is an anti-aliasing technique.
Generate UVW Tag
C4D does not fully support UVW map generation for custom materials. This Indigo for Cinema 4D function allows you to bypass this limitation. Just select a texture tag with an Indigo material applied and click Plugins > Indigo for Cinema 4D > Generate UVW Tag.