Using section planes in SketchUp
Introduction
Section planes allow you to create "cut-away" renders of scenes without having to change the (potentially complex) underlying geometry, using oriented planes to slice away obstructing sections from view. This is related to cut-away diagrams classically used in technical illustration.
In this tutorial we'll cover using SketchUp's section planes with Indigo version 3.4 or newer.
Adding and enabling sections
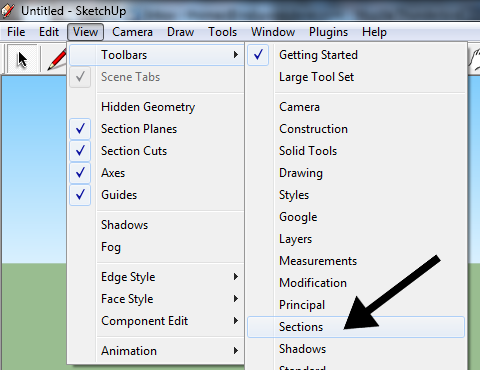
The first thing we'll need to do is enable the Sections toolbar if it is not already enabled; this can be done via the "View" menu, under "Toolbars" -> "Sections":
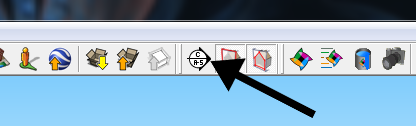
With these controls available, we can now add a section plane using the first tool on the toolbar (Section Plane):
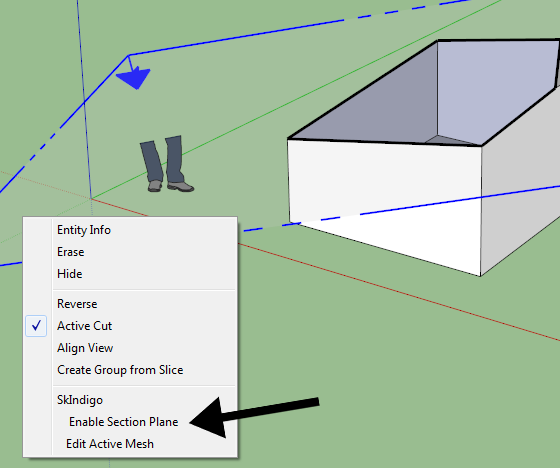
Once the plane has been placed and oriented as desired, we must right-click on it and select "Enable Section Plane" from the SkIndigo sub-menu:
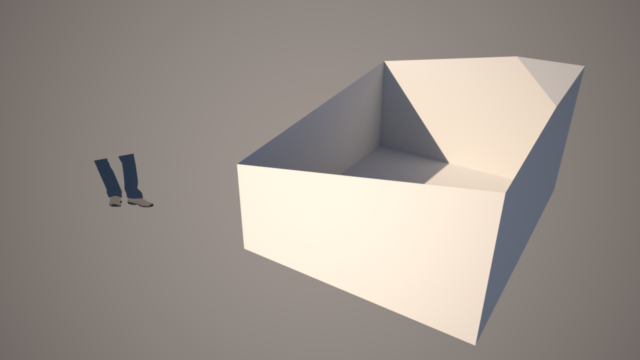
If we now render the scene with Indigo, we see that the section to the front of the section plane is rendered, and the rest has been clipped away:
Multiple section planes can be used together in this manner, to cut away whichever parts of the scene are obstructing an important interior view. There is no performance penalty for using one or many section planes, as they are processed at load-time; however, if a section plane intersects a complex mesh, it may require a considerable amount of extra memory to process during loading.
Pitfalls
If the section plane intersects any media in the scene, there is a chance that the medium definition will become inconsistent.
For example, if a glass pane is sliced by a section plane such that one of the sides is removed, the geometry containing the medium will be open, which can cause rendering problems.