Installing Indigo for C4D on Mac OS X
This tutorial will cover getting Indigo running with Indigo for Cinema 4D on your computer.
This tutorial is for Mac OS X users.
If you have not purchased an Indigo licence, you can still follow this tutorial. Indigo will run in trial mode, which will apply some watermarks to Indigo renders.
-
Check your version of Cinema 4D
The Mac version of Indigo for Cinema 4D is compatible with C4D releases 12 to 19. There are both 32 and 64-bit versions of Indigo for Cinema 4D available.
-
Download and install Indigo
Download Indigo for your system and install it to the default location. Instructions for doing this are in the Indigo Manual. You can download Indigo from:
http://www.indigorenderer.com/download/ -
Download and install Indigo for Cinema 4D
Download the version of Indigo for Cinema 4D for your system from:
http://www.indigorenderer.com/cinema4dExtract the downloaded archive to you Cinema 4D's "plugin" folder, for example:
/Applications/MAXON/Cinema 4D/plugins
After extracting, your folder structure should look like this (an 'Indigo for Cinema 4D' folder inside the plugins folder, that contains all the Indigo for Cinema 4D files and folders):

If you have any issues installing Indigo for Cinema 4D, please email us at support@indigorender.com
-
Restart Cinema 4D
After installing Indigo for Cinema 4D should become available under the Plugins menu.
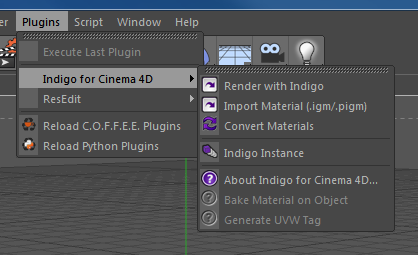
The Indigo for Cinema 4D plugins menu.
You are now ready to use Indigo for Cinema 4D.