Interface
Indigo for Cinema 4D Tags
There are several special tags you can add to you Cinema 4D objects. These tags extend the functionality of certain Cinema 4D objects to include Indigo-specific functions. See the Indigo manual for more information.
Indigo for Cinema 4D Tags
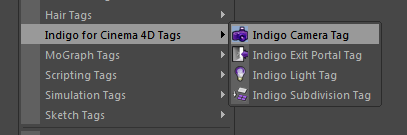
You can access this menu via: Object Manager menu > Tags > Indigo for Cinema 4D
Indigo Camera Tag
Add this to a Cinema 4D camera object to set Indigo specific settings. Use in conjunction with the Cinema4D's camera settings such as focal length and aperture.
See Camera
Indigo Exit Portal Tag
Adding this tag to an object makes this object export as an exit portal. The normals of the object should be pointing in the direction you want the light to enter the room.
Objects with this tag will only be exported as an exit portal and any materials on it will be ignored.
See Exit Portals
Indigo Light Tag
Add this tag to the lights Omni lights, Area lights, or Spot lights to set Indigo specific light options. The options are the same as adding emissions to a material. Because there are no point lights in Indigo, on export these special Cinema4D entities are translated into a mesh and act exactly as if you made a light bulb mesh and applied an emitting material to it.
See Emission, Base Emission
Indigo Subdivision Tag
See Subdivision
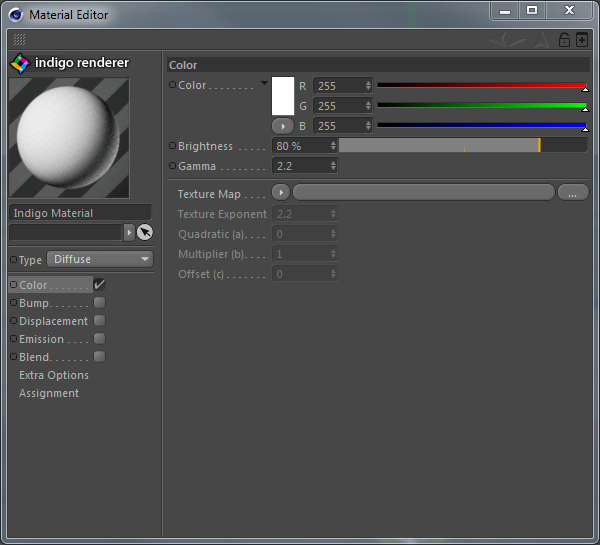
Material Settings
Here you can edit the attributes of an Indigo material. It can be found by selecting an Indigo material and looking in the Attribute Manager, or double-clicking on the Indigo material.
To create a new Indigo material, navigate Material Manager > File > New Indigo Material.
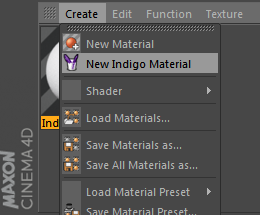
Create new Indigo material
Material Types
See Material Types
Material Channels and Attributes
Extra Options
| Texture Preview Size | This changes the quality of the texture in the Cinema4D view-port, it does not affect the rendered scene at all. |
| Shader Baking resolution: | The resolution to bake a shader at on export. |
| Export Material | Export the material to be used externally. |
| Assignment | Any objects that have this material applied are listed here. |
Plugins Menu
The Plugins Menu is mainly used to create Indigo objects, convert materials and start rendering.
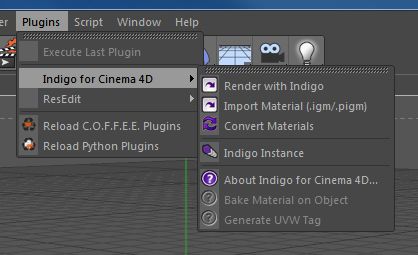
Indigo for Cinema 4D Plugins Menu
Render with Indigo
This exports the current scene to be rendered with Indigo. This works identically to the Cinema 4D command, except it exports using Indigo materials and launches Indigo to render the scene.
Import Material .igm/.pigm
This loads an .igm (Indigo Material) or .pigm (Packed Indigo Material) file from your computer and adds it to your scene so it can be applied to an object.
Convert Materials
This will load all of the Cinema 4D materials and convert them automatically to Indigo materials. Indigo for Cinema 4D will convert all C4D materials automatically on export to Indigo, however using this function will give you more control over the material settings.
Indigo Instance
Creates an instance that can be used to make multiple copies of an object in a memory-efficient and CPU-efficient way. Indigo instances are faster to render than Cinema 4D instances (which aren't real instances but are copies).
Bake Material on Object
Indigo for Cinema 4D bakes all C4D shaders to textures on export, but this feature allows you to bake unique 3D shaders to an objects UV map. It works similar to C4Ds "bake on object" command. A decent UV map is required. To use this function follow these steps:
Select the texture tag of a polygon object that has an Indigo material applied. Click Plugins > Indigo for Cinema 4D > Bake Material on Object.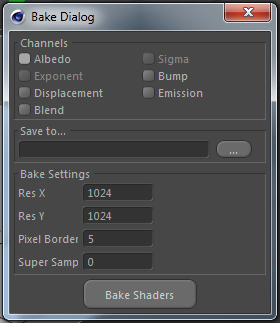
Bake Material on Object dialog box
Select the channels you want to bake and specify an output path. Pixel Border adds a blank border to the output texture file. Super Sample is an anti-aliasing technique.
Generate UVW Tag
C4D does not fully support UVW map generation for custom materials. This Indigo for Cinema 4D function allows you to bypass this limitation. Just select a texture tag with an Indigo material applied and click Plugins > Indigo for Cinema 4D > Generate UVW Tag.
Render Settings
The Indigo Render Settings let you control various aspects of how Indigo will render the scene.

Indigo for Cinema 4D Render settings
Most of the settings used for your renders will be copied directly from the existing Cinema 4D render settings, e.g. width and height come from the Output section of the Render Settings dialogue. However, there are some Indigo specific render settings that can be accessed via:
R10 and R10.5: Render menu > Render settings > Effect... > Indigo Render.
R11 - R12: Render menu > Render settings > General > Set the Render Enigne to 'Indigo Renderer'.
R13: Select 'Indigo Renderer' from the 'Renderer' drop-down in the top left of the Render Settings window.
Note that you need to press the “Effect...” button on the Render Settings window to access the advanced Indigo Settings. You do not need any other render pass, Indigo does it all.
Export Settings
Environment
Render Settings
See Indigo Render Settings, Render Mode
Light Layer Names
See Light Layers