Installation
This sections describes how to Install Indigo for Cinema 4D on your Computer.
Installing Indigo for C4D on Windows
This tutorial will cover getting Indigo running with Indigo for Cinema 4D on your computer.
This tutorial is for Windows users.
If you have not purchased an Indigo licence, you can still follow this tutorial. Indigo will run in trial mode, which will apply some watermarks to Indigo renders.
Step 1: Check your version of Cinema 4D
Indigo for Cinema 4D is compatible with 64-bit versions of releases 12 to 23 of Cinema 4D.
Step 2: Download Indigo
From the page http://www.indigorenderer.com/download-indigo-renderer, download the latest version of Indigo for Windows.
Step 3: Install Indigo
Once you have downloaded the Indigo installer program in Step 2, run the installer program.
If the installer asks you "Do you want to allow the following program to make changes to this computer", select "Yes".
Then accept the licence agreement.
On the 'Choose components' page, select select the C4D Exporter, and press "Next".
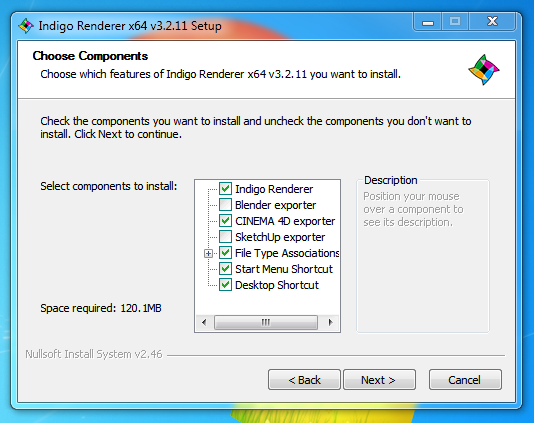
On the "Choose Install location" page, leave the Destination Folder as it is, and press "Install".
Step 4: Install Indigo for Cinema 4D
An installer will launch where you can select the C4D versions you want to install Indigo for C4D for on the "Choose components" page.
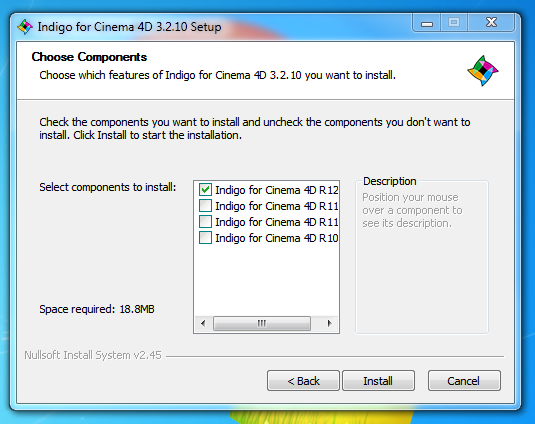
After selecting, press "Next".
For every selected version, another installer will launch.
The installers will try to automatically detect your C4D installation directory. If the directory could not be automatically detected, set it to the main C4D directory.

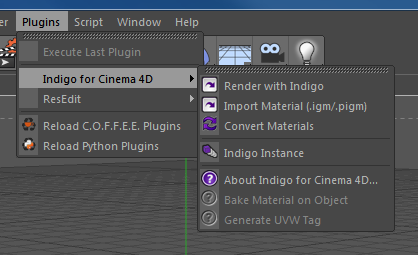
Step 5: Locate Indigo Plugin menu
Once installed you can find Indigo for Cinema 4D in the "Plugins" menu inside Cinema 4D:
Installing Indigo for C4D on Mac OS X
This tutorial will cover getting Indigo running with Indigo for Cinema 4D on your computer.
This tutorial is for Mac OS X users.
If you have not purchased an Indigo licence, you can still follow this tutorial. Indigo will run in trial mode, which will apply some watermarks to Indigo renders.
-
Check your version of Cinema 4D
The Mac version of Indigo for Cinema 4D is compatible with C4D releases 12 to 19. There are both 32 and 64-bit versions of Indigo for Cinema 4D available.
-
Download and install Indigo
Download Indigo for your system and install it to the default location. Instructions for doing this are in the Indigo Manual. You can download Indigo from:
http://www.indigorenderer.com/download/ -
Download and install Indigo for Cinema 4D
Download the version of Indigo for Cinema 4D for your system from:
http://www.indigorenderer.com/cinema4dExtract the downloaded archive to you Cinema 4D's "plugin" folder, for example:
/Applications/MAXON/Cinema 4D/plugins
After extracting, your folder structure should look like this (an 'Indigo for Cinema 4D' folder inside the plugins folder, that contains all the Indigo for Cinema 4D files and folders):

If you have any issues installing Indigo for Cinema 4D, please email us at support@indigorender.com
-
Restart Cinema 4D
After installing Indigo for Cinema 4D should become available under the Plugins menu.
The Indigo for Cinema 4D plugins menu.
You are now ready to use Indigo for Cinema 4D.
Selecting Indigo for rendering externally
This section is about how to select the Indigo installation to use for rendering externally with Indigo Renderer or Indigo RT.
Automatic detection of Indigo installation on Windows
On Windows the Indigo installation directory should be automatically detected.
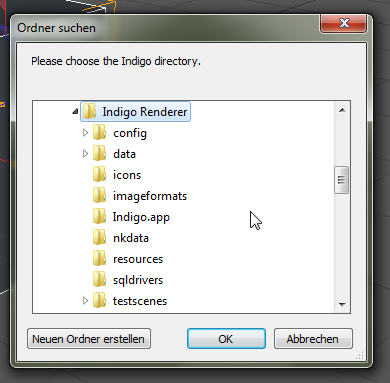
If the installation directory can not be detected Indigo for C4D will show a dialog on export asking to specify the location of indigo.exe.
Selecting the Indigo installation on OS X
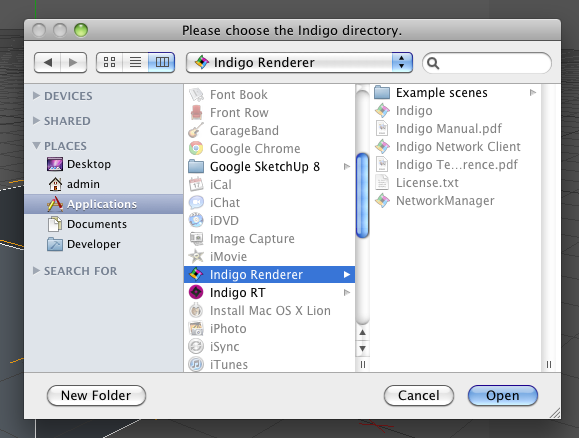
On OS X the installation directory can not be automatically detected. When starting the first export process, a dialog will show up asking to select the directory the Indigo.app is located in.
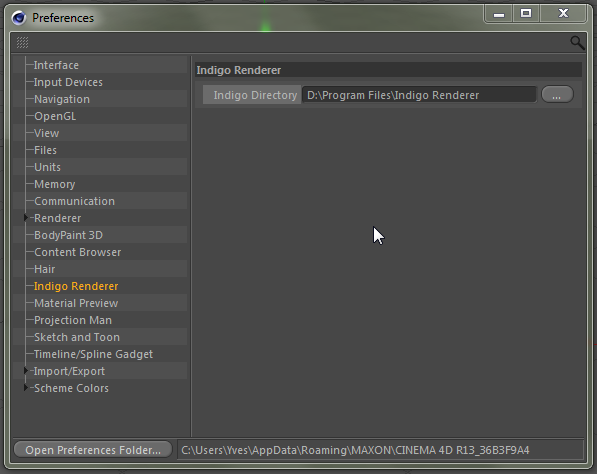
Selecting Indigo installation in Presets in C4D R12 and newer
This part applies to Indigo for C4D 3.4.8 and newer only.
In C4D R12 an newer there is a Indigo Renderer page in the Presets window where the path to the Indigo installation can be changed.
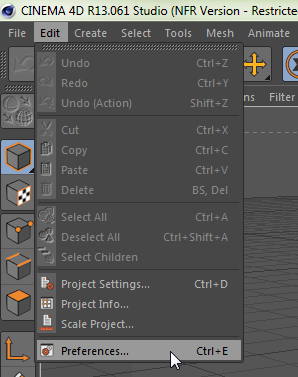
The presets can be accessed from the main menu under "Edit" -> "Preferences" (or with the shortcut CTRL + E).
On windows this path will default to the automatically detected Indigo installation directory.