Interface
Blendigo's functionality is tightly integrated into Blender, so the Indigo camera settings are located in the normal Blender camera options, the Indigo material settings are located in the normal Blender material options, etc.
For the most part these Indigo settings correspond exactly to those documented in the corresponding manual section.
Camera Settings
The settings in this section correspond exactly to the normal Indigo camera settings, which should be referred to for more information about the various options.
Environment Settings
The settings in this section correspond exactly to the normal Indigo environment settings, which should be referred to for more information about the various options.
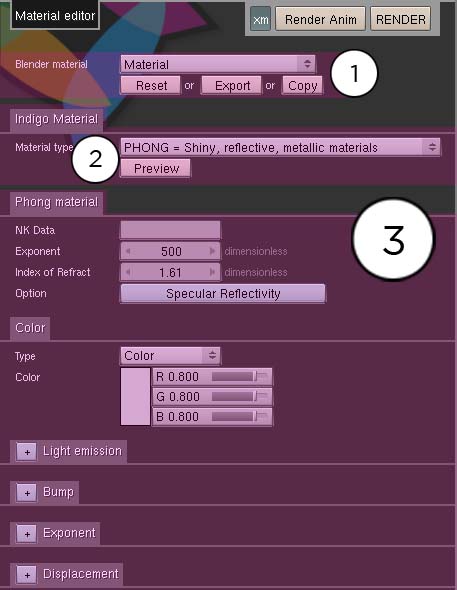
Material Editor
The materials setting page is used to configure the materials in the scene.
Blendigo will try and convert your Blender materials to Indigo materials as far as possible – but you are recommend to use Blendigo's material editor for more accuracy and control of your Indigo materials.
-
Blender material
This is the name of the blender material you are editing. When you select a new object, the objects material will be selected in Blendigo – so just right click on an object in your scene to select it in Blendigo.
Reset Reset to the original Blender material Export Export to an Indigo Material file (.IGM). Copy Copies the currently set Indigo material so you can copy it to another Blender material. -
Indigo Material
See Material Types
-
Material Channels
Mesh Subdivision
To use it you need to have blendigo open, then select a mesh in your scene and enable subdivision. Indigo subdivision works the same as the subsurf modifier available in Blender. It can be useful to use Indigo's built in subdivision because the models in Blender can have a low polygon count that are faster to work with – yet you still get a high quality render.
Subdivision in Indigo can also helpful for getting smooth results on objects that have displacement mapping.
See Mesh Subdivision
Render Settings
Renderer settings are for controlling the inner workings of Indigo. Most Indigo users will not have to modify from the default Blendigo settings.
System Settings
System settings are for controlling the Indigo application. Most Indigo users will never have to modify from the default Blendigo settings.
Tone mapping
Tone mapping is the process whereby the high dynamic range (HDR) image internally stored by Indigo is converted to a low dynamic range (LDR) image for display on a normal computer screen.
The settings in this section correspond exactly to the normal Indigo tone mapping settings, which should be referred to for more information about the various options.