Page 1 of 2
Studio lighting tests
Posted: Tue Jan 12, 2010 10:14 pm
by Doug Armand
Thought I would see if I could create some studio lights to mimic real ones used in product and such photography. These are simple meshes designed to replicate real studio lights.
So first the brolly.

- WhiteBrolly.jpg (81.92 KiB) Viewed 36173 times
Using just one brolly - material is set to diffuse white

- 1Brolly.jpg (100.29 KiB) Viewed 36181 times
Next one is Two brollies - one is emitting at half power

- 2Brolly.jpg (97.23 KiB) Viewed 36176 times
Then 2 brollies again - this time the material is a reflective metal - al.nk to simulate a shiny reflective brolly

- 2ReflectiveBrolly.jpg (106.73 KiB) Viewed 36179 times
This one is a large softbox

- Largesoftbox.jpg (67.85 KiB) Viewed 36172 times

- Largesoftboximage.jpg (105.04 KiB) Viewed 36178 times
And finally striplights - 4 of them

- Striplights.jpg (97.94 KiB) Viewed 36170 times

- Striplightsimage.jpg (95.96 KiB) Viewed 36167 times
Re: Studio lighting tests
Posted: Wed Jan 13, 2010 12:32 am
by djegoo
I really like the softness of the shadows. Especially for the lagresoftbox one.
Really nice.
Re: Studio lighting tests
Posted: Wed Jan 13, 2010 12:38 am
by PureSpider
Impressive!

Are the emitters facing inside the boxes?
Would love to recreate such a setup for my studio renders

Re: Studio lighting tests
Posted: Wed Jan 13, 2010 1:19 am
by Doug Armand
PureSpider wrote:Impressive!
Are the emitters facing inside the boxes?
Would love to recreate such a setup for my studio renders
The Softbox and striplights are just a simple box with one face given a diffuse/transparent material - all other faces are black - the lightsource, circled in red, is a simple plane with a emitter material.

- LargesoftboxMesh.jpg (44.34 KiB) Viewed 36083 times
The reflectors are basically half a sphere with the end face of a cylinder for the light source.

- WhiteBrollyMesh.jpg (46.35 KiB) Viewed 36088 times
This method of creating a 'real' studio light gives a nice diffuse and soft light source - you can vary the softness by sizing the light emitters or increasing/decreasing distances
Re: Studio lighting tests
Posted: Wed Jan 13, 2010 1:38 am
by PureSpider
So I assume the transparent material is the green face in that one screenshot (Striplights.jpg) of yours?
Re: Studio lighting tests
Posted: Wed Jan 13, 2010 3:01 am
by Doug Armand
PureSpider wrote:So I assume the transparent material is the green face in that one screenshot (Striplights.jpg) of yours?
Yes thats correct - its a diffuse material with transparency on
Re: Studio lighting tests
Posted: Wed Jan 13, 2010 9:27 am
by Stinkie
Nice tests. Bookmarked for reference.

Re: Studio lighting tests
Posted: Wed Jan 13, 2010 10:20 am
by CTZn
How about diffuse_transmitter planes... to smooth lighting I suppose ?
Great demonstration !
Re: Studio lighting tests
Posted: Thu Feb 25, 2010 1:01 pm
by Soup
(linked here from SILK thread)
Hey Doug would it be possible to get some of these scenes hosted for everyone to use? It's the kind of thing that would help people show off any little models they made. And it would be great if they were in different formats for the other supported 3d packages
Re: Studio lighting tests
Posted: Thu Feb 25, 2010 1:21 pm
by Borgleader
We could also write some sort of tutorial on building the right type of studio setup depending on exactly which effect you want. I mean...I'm sure there are ways to tweak a studio setup to make things more interesting depending on the model
Re: Studio lighting tests
Posted: Thu Feb 25, 2010 2:24 pm
by Doug Armand
Soup wrote:(linked here from SILK thread)
Hey Doug would it be possible to get some of these scenes hosted for everyone to use? It's the kind of thing that would help people show off any little models they made. And it would be great if they were in different formats for the other supported 3d packages
Sure but I only have access to Blender - someone else can convert?
I'll see what I can do over the next week or so
Re: Studio lighting tests
Posted: Thu Feb 25, 2010 2:34 pm
by Borgleader
Or you could just give instructions on how to build each of them? I mean...then someone with another package could build a "clone"?
Looks to me like the first one is a uvsphere cut in half an duplicated, with a scaled down circle as an emitter and the bottom is a cylinder cutinhalf with the ends removed and the bottom edge extruded out. I mean its not like having the scene ready made but its buildable in 5-10 min tops?
Re: Studio lighting tests
Posted: Thu Feb 25, 2010 2:44 pm
by Doug Armand
Borgleader wrote:Or you could just give instructions on how to build each of them? I mean...then someone with another package could build a "clone"?
Looks to me like the first one is a uvsphere cut in half an duplicated, with a scaled down circle as an emitter and the bottom is a cylinder cutinhalf with the ends removed and the bottom edge extruded out. I mean its not like having the scene ready made but its buildable in 5-10 min tops?
I have already done this - see this earlier post in this thread except this earlier post also has images to illustrate how

Doug Armand wrote:
The Softbox and striplights are just a simple box with one face given a diffuse/transparent material - all other faces are black - the lightsource, circled in red, is a simple plane with a emitter material.
The reflectors are basically half a sphere with the end face of a cylinder for the light source.
This method of creating a 'real' studio light gives a nice diffuse and soft light source - you can vary the softness by sizing the light emitters or increasing/decreasing distances
Re: Studio lighting tests
Posted: Fri Feb 26, 2010 12:47 am
by Borgleader
Yes yes you described the scene with the materials for each part, I gave modeling instructions-ish
Re: Studio lighting tests
Posted: Fri Feb 26, 2010 5:29 am
by Doug Armand
I've created a blender file with 3 different lights and 4 different studio light setups
Please note that this is using Blender 2.49a, Indigo V2.2.12 and Blendigo 2.2 stable - if it doesn't work for you first make sure your using at least these versions.
http://cid-dee301fc4ac2d000.skydrive.li ... etup.blend
The lights are on different layers - the pictures below show the setup and what layers are needed to be enabled for them.
SoftBox

- Layers 1+2
- SoftboxBlender.jpg (13.66 KiB) Viewed 35302 times
Reflector Brolly

- Layers 1+3
- BrollyreflectorBlender.jpg (6.2 KiB) Viewed 35309 times
2x Reflector Brollies

- Layers 1+3+4
- 2xBrollyreflector.jpg (6.43 KiB) Viewed 35304 times
Ringlight
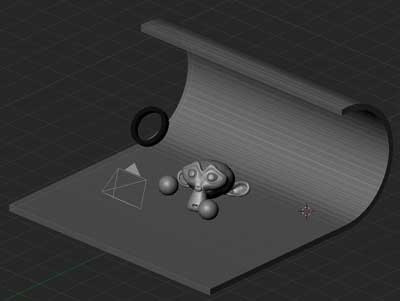
- Layers 1+5
- RinglightBlender.jpg (6.05 KiB) Viewed 35303 times
In a few days I will render all the variants of this scene as well as describe how I modelled them in Blender - very easily - but too busy rendering another image atm