
This tutorial follows on from the Getting Started guide, and covers the basic rendering and material editing workflow. Basic familiarity with 3ds Max is assumed.
Rendering the basic scene geometry
We begin with an empty 3ds Max scene, and create a teapot on a pedestal as shown:

Before rendering, we must assign Indigo as the active renderer in the Render Setup dialog (keyboard shortcut: F10), as per the Getting Started guide.
If there are no light sources present, which is the case in a newly created scene, IndigoMax will use a sun/sky background to illuminate the scene.
So if we now hit Render, we get an image like this:

Adding Indigo Material light sources
Next we will use our own light sources to illuminate the scene, instead of the default lighting. Lights in Indigo must have finite area, i.e. they cannot be point or directional lights; so we create the simplest possible surface, a quad patch, and point it at the teapot (two lights are shown here, illuminating from the sides):

We must now create a material for this object, to specify an emission parameter. Open the Material Editor window and create a new Indigo Material, which we'll call "emitter".
In the emitter material settings, we'll set a black albedo colour (i.e. our light doesn't reflect any light) and a "white" emission colour:

Adding Phong Indigo Materials
We'll also create two new Indigo Materials for the teapot and the pedestal. Change the teapot material definition to "Phong", then turn it into copper by choosing its chemical name "Cu" from the Complex IOR combo box. For the pedestal material we'll simply choose a dark green colour for the Phong albedo:

If we now apply the emitter material to the two light quads, and the teapot and pedestal materials to their respective models, we get the following rendered result:

Using specular materials
Another important material type is Specular, which simulates perfect reflection and refraction as governed by the physical Fresnel equations to produce realistic glass, water, acrylics etc.
The use of this material type is somewhat more complex than others, since objects with Specular materials must be closed (so as to produce a containing medium). For more information on this please see the manual page on physically-correct glass modelling.
We'll turn the copper teapot material into a glass material by changing its material definition to "Specular / glossy transparent". To give the glass some colour, we sett its transmittance colour to a cyan, and increase the Strength a bit to make it darker / more dense:

To better illustrate the effect of the Specular material we put a while wall behind the teapot and pedestal, and change the pedestal to be made of gold:

Final notes
There is an increased amount of noise in the image, due to the complex light paths which can result from specular light interactions. Indigo's strictly unbiased rendering can have difficulty rendering such scenes cleanly using the normal sampling mode, and for these situations the MLT sampling mode can be of assistance.
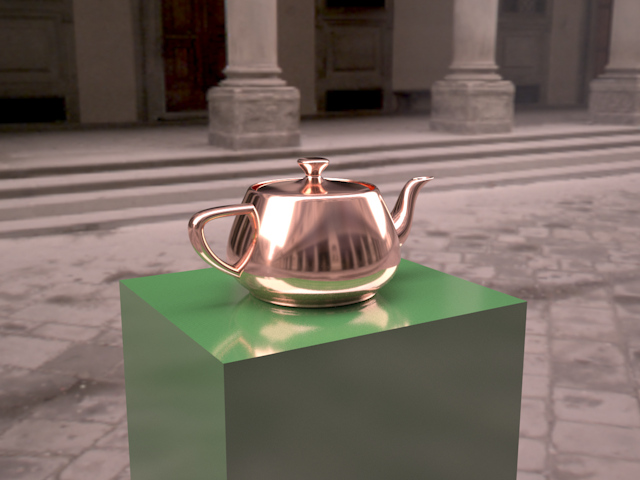
HDR illumination is easy to set up, allowing for realistic and efficient illumination from distant light sources, as specified by Indigo Texture maps (illustrated here by the Uffizi Gallery HDR image by Paul Debevec):
This concludes the basic usage tutorial. For more information on using Indigo please refer to the rest of the manual and our Tutorials section, and our Forum contains a wealth of useful information (besides being a great community to interact with!).